


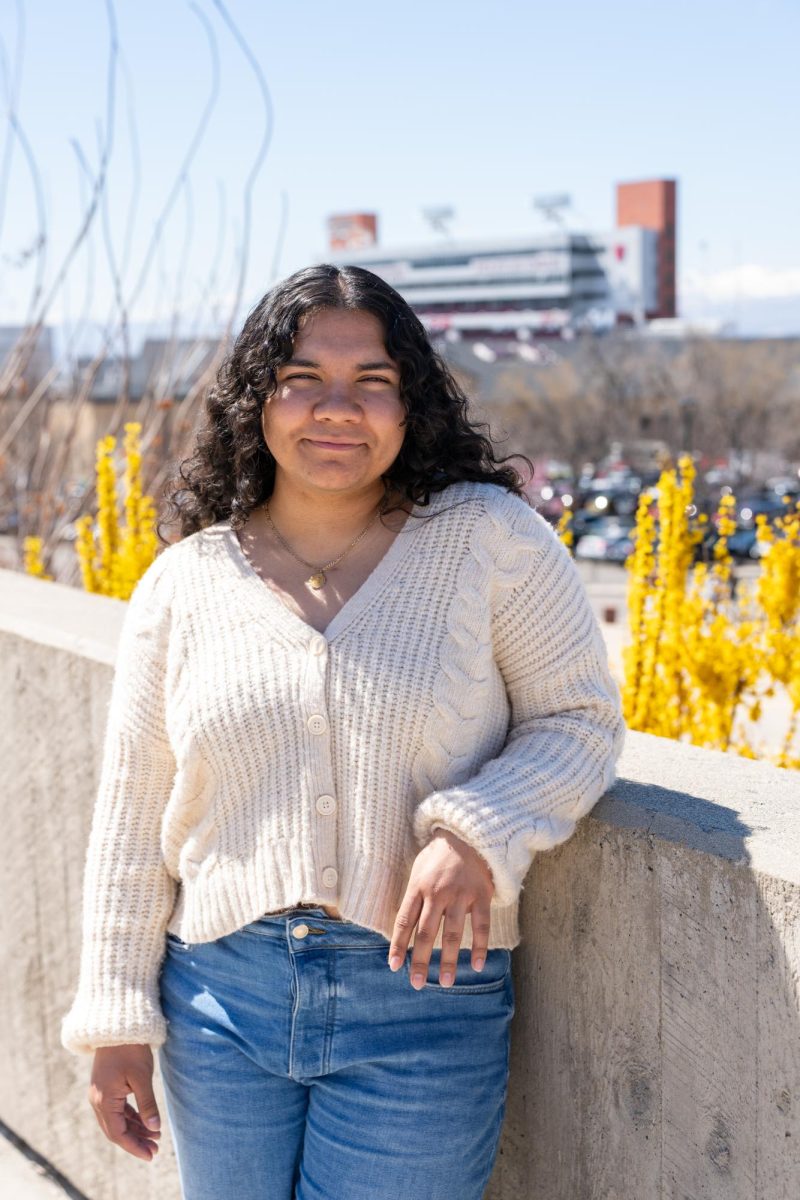


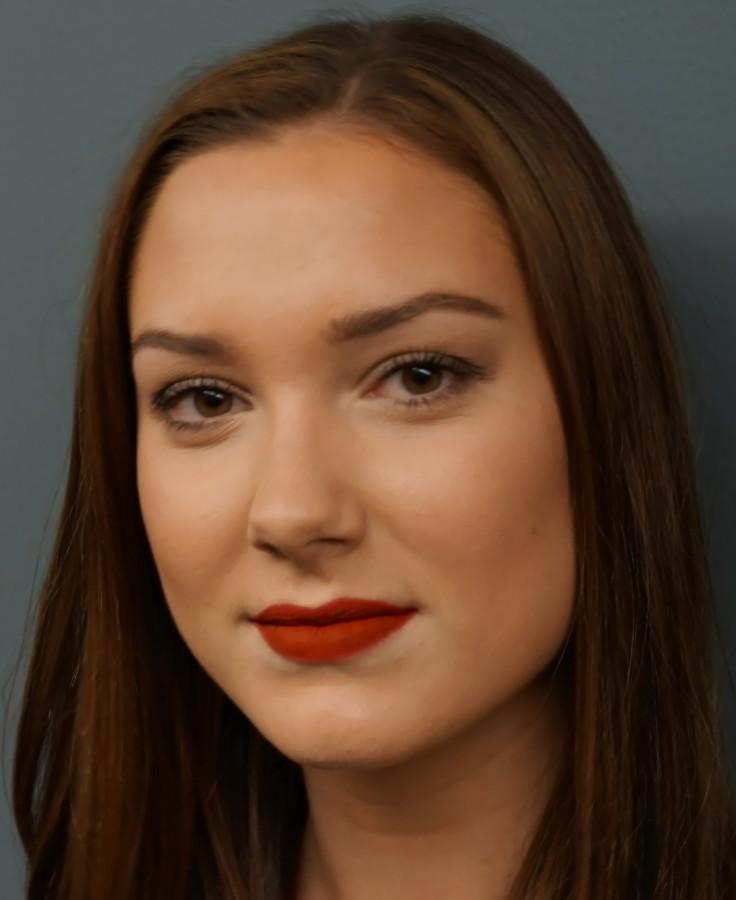
As the weather gets colder, the makeup looks get darker and bolder. Fall is the perfect time to pick up a rich, dark lipstick color and play around with your features. Montana Haskell, a U student, was kind enough to let me play up her face by applying a natural eye with a dark and bold lip. Read on to see how to create this look on yourself.
The products you use are key to any makeup routine. It is important to make sure the products work well with your skin tone and type. Many people don’t know if they have a yellow or pink undertone in their skin. The easiest way to tell is to look at your skin while you aren’t wearing any makeup and see whether your skin has a red or a yellow tone. Another key factor you have to consider is whether you have dry, normal, oily or combination skin.
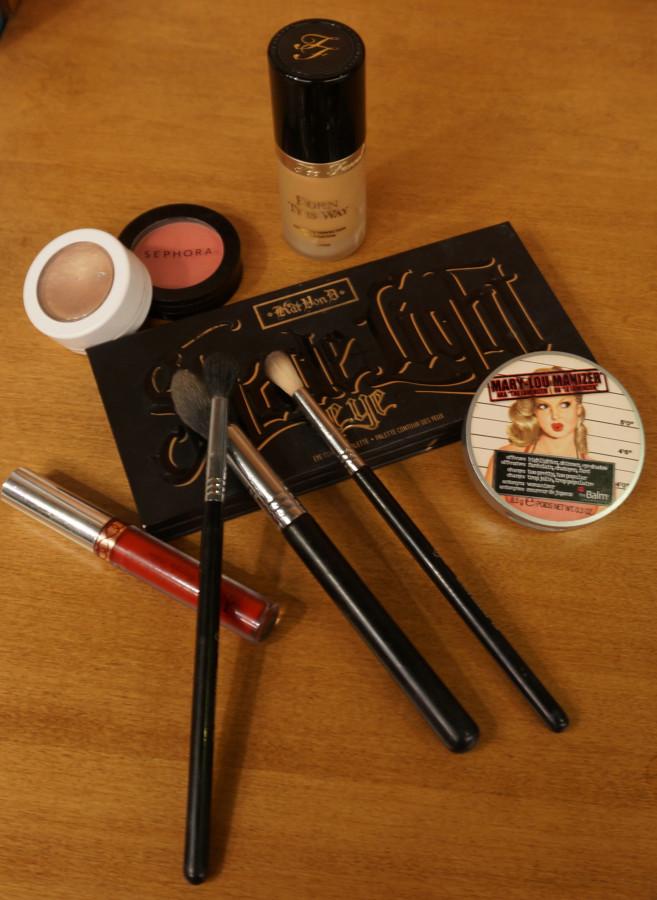
After discovering your skin type and tone, here are some products you can use to create your look:
Products for your base:
Too Faced Born this Way Foundation in light beige and warm beige
Revlon PhotoReady Illuminator in Peach
Too Faced Hangover Replenishing Face Primer
Smashbox Photoready Pore Minimizing Primer
Maybelline Fit Me Concealer in Light and Sand
Maybelline Face Studio Master Studio Concealer in Light
Make Up For Ever Concealer Kit in Number 2 and 4
Mary-Lou Manizer The Balm
Colourpop Higherligher in Wisp
Sephora Blush in Romantic Rose
bareMinerals Bronzer in Skinny Dip
Benefit Hoola Bronzer
Sigma and Real Technique Brushes
Products for your eyes:
Kat Von D Shade+Light Eye Palette
Sigma Brushes
Products for your brows:
Lip balm of your choice
Anastasia Beverly Hills Dipbrow Pomade in Chocolate
Sigma Brow Powder Duo in Light Medium
L’Oreal Brow Stylist in Clear
Products for your lips:
Anastasia Beverly Hills Liquid Lipstick in Bloodline
Colourpop Lipliner in Frenchie
Start with a clean face and apply your favorite moisturizer. One of the most important things about makeup is making sure you are starting with a hydrated and primed face. After applying moisturizer, I applied Too Face Hangover Replenishing Primer all over, then I applied Smashbox Pore Minimizing Primer in the T zone (the middle of the forehead, nose, apples of the checks and chin). I like to let the primers sink in for about five minutes before moving on to foundation.
For foundation I mixed together two colors of Too Faced Born this Way — Light Beige and Warm Beige. I also added a drop of the Revoln Face Illuminator in Peach to the mixture. I then applied this to the face using a Real Technique Stippling Brush. You want to start in the area that requires the most coverage and work outwards toward the hairline. For Montana, I started on the checks and worked in padding motions until her face was covered to my liking.
The next step is highlighting and contouring. I used Makeup Forever Concealer Kit in No. 2 and No. 4 for her highlight and contouring. Make sure the contour color is more on the cool side instead of warm red tones — this will make the contour look like a natural shadow rather than an obvious line. I took two colors in kit No. 4 and blended into the hairline, under the cheekbones and jaw. I then took No. 2 and drew two downwards triangles under the eyes, a line down the bridge of the nose, some on the chin and a little in the middle of the forehead to highlight. After you blend all of that product in, take Make Up For Ever HD Translucent Powder to set your face. I added bareMinerals Skinny Dip Bronzer and went over the same areas I placed kit No. 4 on to deepen her contour. I then added Mary-Lou Manizer onto the high points of the cheekbones, down the bridge of her nose and a drop on the Cupid’s bow, located right above your lip, under your nose. The final touch for the face is adding blush. I used Sephora’s Romantic Rose Blush and dabbed it onto the apples of the cheeks and blended backwards.
Now you can move onto the eyes and brows. For Montana I used Anastasia Dipbrow Pomade in Chocolate and Sigma Brow Duo in Light/Medium to lightly fill in the brows. The most important thing to remember when filling in brows is to only fill in the natural arch and follow the lines of the brow. The goal is to create a fuller brow without looking like you drew them on. After finishing the brows, set them into place all day with L’Oreal Brow Stylist in Clear.
For the eyes, I used Kat Von D Shade+Light Eye Palette. The main thing to keep in mind about this eye look is blending. You are going to want to take the peachy shade in the palette and blend this into the crease of your eye. Then take one of the lighter whites in the palette and place this all over the lid. Take the peachy shade again and blend through your crease to make sure everything is smooth. I added a touch of drama in the corners and mixed a dark brown and black into the outer “v” of the eye to add more flair. Take the same brush you used with the peachy shade and give everything one more final blend. For a finishing touch, add a shade of brown under the lower lashes and a touch of a white shadow into the inner corner of your eye. Curl your lashes and coat them in mascara, and your eyes are done.
The final step is the lips. I used Anastasia Liquid Lipstick in Bloodline and Colorpop Lip Liner in Frenchie. Start by outlining your lips and then slightly fill them in. Take the liquid lipstick and carefully fill in the rest of your lips. The great thing about this color is that it’s blue-based, so it will make your teeth appear whiter. This color will dry matte and won’t budge from your lips.
After you are all done, it’s time to head out. You can always change up the color of your lip to try something bold and different for yourself. Plums, mauves and deep nudes are great for fall as well. Stay tuned for next week as I show you some more lip colors you can rock into fall.